This blog was primarily driven by questions from my peers and colleagues who wondered where my blog was hosted and how it was created. It might help to move from a hosting platform to your own website and where to start.
Like most bloggers I started my blog using one of the hosting platforms but soon after found some limitations in choosing appearance, plugins and was a bit annoyed by some commercial banners on my page. After a while I decided to move to my own site. I bought a domain name for myself and created my own environment using the WordPress software on a cloud VM. It didn’t cost me too much but it was not entirely for free. When Oracle introduced some additions to the always free set of resources. I decided to give it a try and move my blog entirely to the OCI free tier.
For those who would like to skip the reading and try, I have a set of Terraform scripts on GitHub. They haven’t been updated lately and use not the latest versions but can be a good place to start.
In May of 2021 Oracle introduced the ARM platform in the Oracle Cloud Infrastructure (OCI). It was using Ampere Altra processors and in addition to the low cost provided more opportunities for tests and trials using the OCI free tier resources. It gave us up to 4 Arm Ampere A1 Compute cores and 24 GB of memory either in one VM or distributed among several machines (up to 4). So, what could we do with 4 CPU and available memory? We could install our own WordPress site and start blogging about Oracle cloud. That was exactly what I did.
I am fully aware that Oracle has its own sample WordPress installation on OCI based on Docker . Oracle published it on the default page of the OCI console and you can check it out there. My installation is a bit different and uses a VM in a dedicated network exposed to the internet through load balancer. Here is a diagram of the environment generated by the okit tool.

It is a bit more old school than any Kubernetes, docker or other types of installations but it is safe enough and gives flexibility to tailor your site and server configuration as you want. The configuration uses a dedicated private subnet for the ARM VM with WordPress installation and a free OCI Load Balancer.
So, what do you need to install on your WordPress VM? For WordPress you need HTTP server, MySQL server, PHP and WP distribution. When I tried it for the first time I installed default apache http server, default PHP, MySQL and the latest on that point of time WP version. Everything went well until I tried to start and configure my site. I got the following error:
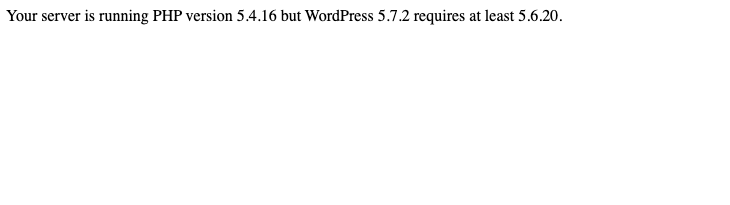
Apparently my PHP was too old. I checked the compatibility matrix and it looked like I should install at least PHP 5.6. So, I started from scratch and installed all the new versions. After that I created Terraform based deployment to automate most of the steps and leave only last configuration steps to the user. You can find it in my GitHub repository.
Here is step-by-step installation of WordPress to the ARM based VM.
First you have to install the PHP version required for your WP according to the matrix I mentioned before. I’ve chosen PHP 7.3 for myself at that time.
[opc@gleb-a1-test-01 ~]$ sudo yum install rh-php73-php
[opc@gleb-a1-test-01 ~]# sudo cp /opt/rh/rh-php73/enable /etc/profile.d/php7.3.sh
Then you need to start and enable HTTP24 service. You can choose Nginx or any other Web server and in that case some steps will be different.
[opc@gleb-a1-test-01 ~]$ sudo systemctl start  httpd24-httpd.service
[opc@gleb-a1-test-01 ~]$ sudo systemctl enable  httpd24-httpd.service
[opc@gleb-a1-test-01 ~]$ sudo mkdir /var/www/
[opc@gleb-a1-test-01 ~]$ sudo ln -s /opt/rh/httpd24/root/var/www/html /var/www/html
The next step is installing required PHP packages to support the MySQL, install the MySQL databases server and start it.
[opc@gleb-a1-test-01 ~]$ sudo yum install rh-php73-php-mysqlnd rh-php73-php-gd rh-php73-php-mbstring rh-php73-php-xml rh-php73-php-json
[opc@gleb-a1-test-01 ~]$ sudo yum install install mysql-server
[opc@gleb-a1-test-01 ~]$ sudo systemctl start mysqld
You can get the MySQL root temporary password to environment variable using the command:
mysqlpwd=`sudo grep 'temporary password' /var/log/mysqld.log | awk '{print $13}'`
Then we need to open ports for our load balancer by adding them to the firewall configuration. Here I show how to open port 80 for HTTP but in real configuration you would need 443 for TLS connection.
[opc@gleb-a1-test-01 ~]$ sudo firewall-offline-cmd  --zone=public --add-port 80/tcp
[opc@gleb-a1-test-01 ~]$ sudo firewall-offline-cmd  --zone=public --add-port 443/tcp
[opc@gleb-a1-test-01 ~]$ sudo systemctl restart firewalld
We need to secure our MySQL. To do that you can use either mysql_secure_installation script coming with the MySQL or run commands manually after connecting as the root user.
Here is a connection to MySQL for those who are not familiar with the databases. Do you remember our mysqlpwd environment variable?
[opc@gleb-a1-test-01 ~]$ mysql -u root -p${mysqlpwd}
Then we run in the sql session:
ALTER USER 'root'@'localhost' IDENTIFIED WITH mysql_native_password BY '${mysqlpwd}';
DELETE FROM mysql.user WHERE USER='root' AND Host NOT IN ('localhost', '127.0.0.1', '::1');
DELETE FROM mysql.user WHERE USER='';
DELETE FROM mysql.db WHERE Db='test' OR Db='test_%';
FLUSH PRIVILEGES;
The next step is to configure your WP database and user in MySQL. My advice is to avoid using the same password as for root but rather prepare your own.
CREATE USER 'wordpress'@'localhost' IDENTIFIED WITH mysql_native_password BY '${mysqlpwd}';
CREATE DATABASE wpdb;
GRANT ALL PRIVILEGES ON wpdb.* TO 'wordpress'@'localhost';
FLUSH PRIVILEGES;
Everything is ready and you can go forward and download the WordPress from here and install it to our web folder. The downloaded WP binaries are in the home directory as the latest.tar.gz file.
[opc@gleb-a1-test-01 ~]$ sudo tar zxf latest.tar.gz -C /var/www/html/ --strip 1
[opc@gleb-a1-test-01 ~]$ sudo mkdir /var/www/html/wp-content/uploads
[opc@gleb-a1-test-01 ~]$ sudo chown apache. -R /opt/rh/httpd24/root/var/www/html
[opc@gleb-a1-test-01 ~]$ sudo chcon -t httpd_sys_rw_content_t /opt/rh/httpd24/root/var/www/html -R
[opc@gleb-a1-test-01 ~]$ sudo chown apache:apache /var/www/html/wp-content/uploads
Now we just need to restart our HTTP server to make our site available.
[opc@gleb-a1-test-01 ~]$ sudo systemctl restart httpd24-httpd.service
The further actions require a password for your wordpress MySQL user and the database name (wpdb). You need to open your site connecting to the IP using the URL like http:// . If you are using my terraform scripts then the terraform will provide you the public IP for your Load Balancer and in this case you will need to connect to the URL http:// .
The rest of the steps and full installation process is also provided by WordPress and you can compare the steps or, if you’ve found an error, please let me know.
A short conclusion. I hope you can test and start to use OCI free resources not only for testing but also to promote and share knowledge using your own blog site. In this article I don’t dive into SSL configuration for a new WordPress site and might blog about it in one of the following posts. SSL will be essential for any public facing website including your blog.