If you have an Apex app on top of your Oracle Autonomous database you have the application URL like https://m5c5hpup7eqqydh-glebatp01.adb.us-ashburn-1.oraclecloudapps.com/ords/r/covid/covid-ontario/covid_ontario. This is already better than it used to be before and have a friendly path in the URL but what if you want to use your own domain address and custom URL? This blog is about how to set it up using reverse proxy. The way with a custom ORDS is a subject for another post.
So, you have your own domain registered in DNS, for example apex.gleb.ca and an application like I’ve listed above. What you want to do is to make the application URL as https://www.apex.gleb.ca/covid/ . What we are going to use is a virtual machine with a Nginx web server serving as a reverse proxy to your Apex application created on the Oracle Autonomous database.
The first step is to get the virtual machine for the proxy. In the Oracle Cloud you have an “Always Free” tier which includes a couple of AMD based VMs and the ability to create up to four ARM instances free of charge. You can read more about all free resources here. I’ve chosen an ARM type machine VM.Standard.A1.Flex with one CPU and 4 GB of memory and Oracle Linux 8.6. It will be quite enough to run a small proxy instance. I am not describing the provisions of the instance or how to subscribe to the Oracle OCI assuming that if you already have an Oracle Apex application on Autonomous you know that. But if you are starting from scratch here is a good place to start.
Having the instance and connected as the opc user now it is time to install the required software.
sudo dnf update
sudo dnf install nginx
When it is installed we enable, start and verify the nginx service on the VM.
sudo systemctl start nginx
sudo systemctl status nginx
The next step is to make the http and https open in the firewall.
firewall-cmd --permanent --zone=public --add-service=http
firewall-cmd --permanent --zone=public --add-service=https
firewall-cmd --reload
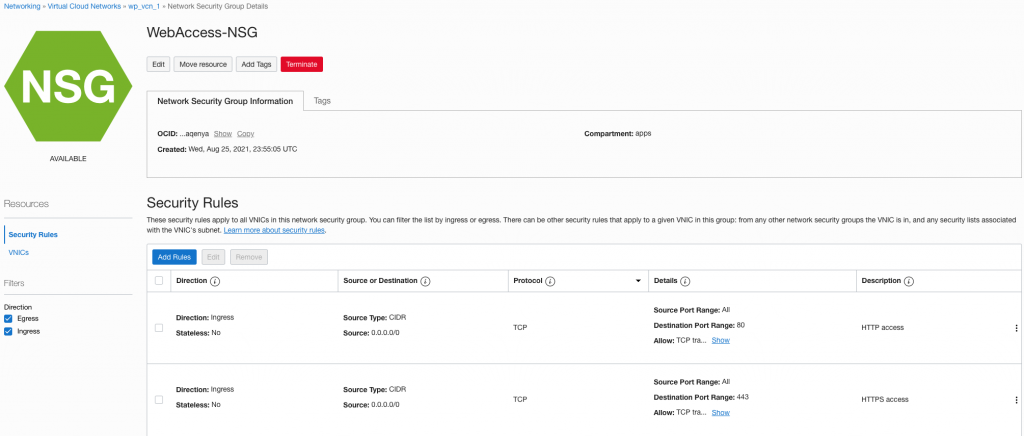
Then we can prepare a network security group with open 80 and 443 ports to the VM instance. If you are on OCI you are going to “Networking” -> “Virtual Cloud Network” -> your network, click on your network and click on the “Network Security Groups” on the right. Here you can add a new group and provide ingress access to port 80 and 443. Here is an example.
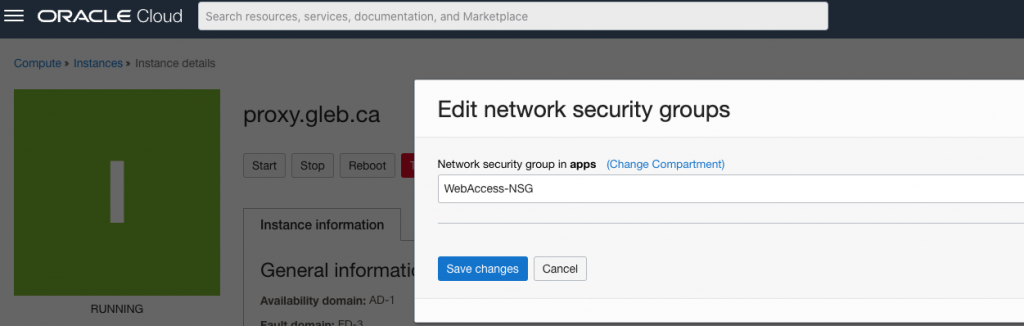
And assign the security group to our proxy VM.
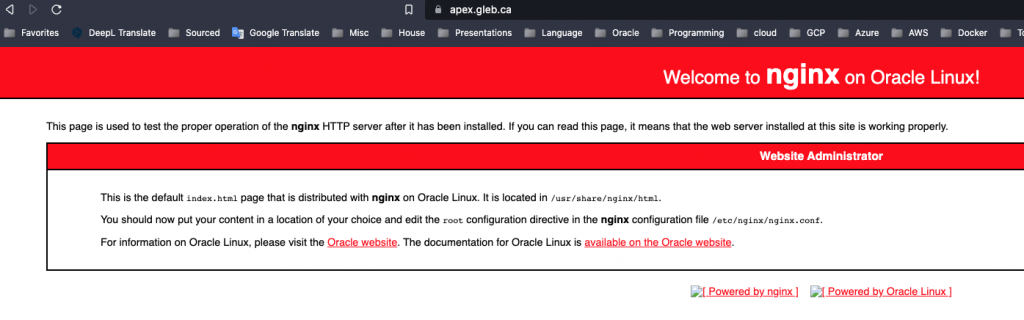
Now if you try to put your domain name such as apex.gleb.ca or the public IP for the instance to the address bar in the browser you should see the default Nginx welcome page.
Now we need to configure our application proxy in the Nginx configuration. The configuration files are located in the /etc/nginx directory. We are creating a new configuration file for our application in the /etc/nginx/conf.d directory where we define the main parameters. Here is an initial configuration.
#Default folder
server {
    listen         80;
    listen         [::]:80;
    server_name    apex.gleb.ca www.apex.gleb.ca;
    root           /usr/share/nginx/html/apex.gleb.ca;
    index          index.html;
    try_files $uri /index.html;
}
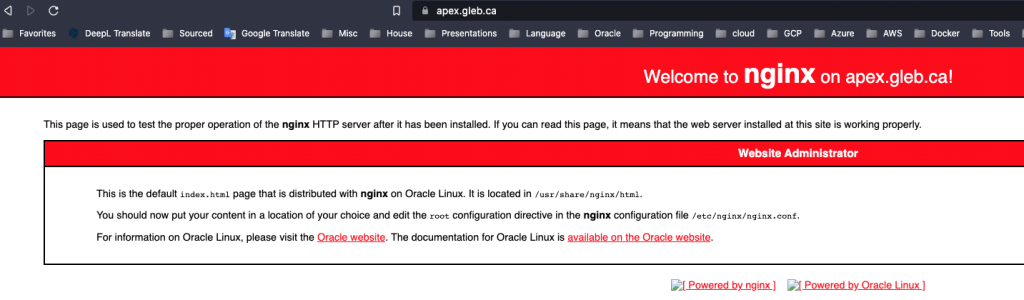
Now we can copy the index.html to the new directory and test it in our browser. I’ve slightly modified the title in the file to see the difference. You can see the “on apex.gleb.ca” in the first line.
sudo mkdir  /usr/share/nginx/html/apex.gleb.ca
sudo cp /usr/share/nginx/html/index.html /usr/share/nginx/html/apex.gleb.ca/
sudo nginx -t
vi /usr/share/nginx/html/apex.gleb.ca/index.html
Now we need to get a certificate for our domain if you still don’t have one. I am using “Let’s Encrypt” (https://letsencrypt.org/) for my domains including my blog site. Here is how I’ve done that for the apex.gleb.ca:
pip3 install certbot
pip3 install certbot-nginx
certbot --nginx

#output
Saving debug log to /var/log/letsencrypt/letsencrypt.log
Python 3.6 support will be dropped in the next release of Certbot - please upgrade your Python version.
Enter email address (used for urgent renewal and security notices)
 (Enter 'c' to cancel): glebot@hotmail.com

- - - - - - - - - - - - - - - - - - - - - - - - - - - - - - - - - - - - - - - -
Please read the Terms of Service at
https://letsencrypt.org/documents/LE-SA-v1.2-November-15-2017-w-v1.3-notice.pdf.
You must agree in order to register with the ACME server. Do you agree?
- - - - - - - - - - - - - - - - - - - - - - - - - - - - - - - - - - - - - - - -
(Y)es/(N)o: Y

- - - - - - - - - - - - - - - - - - - - - - - - - - - - - - - - - - - - - - - -
Would you be willing, once your first certificate is successfully issued, to
share your email address with the Electronic Frontier Foundation, a founding
partner of the Let's Encrypt project and the non-profit organization that
develops Certbot? We'd like to send you email about our work encrypting the web,
EFF news, campaigns, and ways to support digital freedom.
- - - - - - - - - - - - - - - - - - - - - - - - - - - - - - - - - - - - - - - -
(Y)es/(N)o: N
Account registered.

Which names would you like to activate HTTPS for?
- - - - - - - - - - - - - - - - - - - - - - - - - - - - - - - - - - - - - - - -
1: apex.gleb.ca
2: www.apex.gleb.ca
- - - - - - - - - - - - - - - - - - - - - - - - - - - - - - - - - - - - - - - -
Select the appropriate numbers separated by commas and/or spaces, or leave input
blank to select all options shown (Enter 'c' to cancel): 1,2
Requesting a certificate for apex.gleb.ca and www.apex.gleb.ca

Successfully received certificate.
Certificate is saved at: /etc/letsencrypt/live/apex.gleb.ca/fullchain.pem
Key is saved at:         /etc/letsencrypt/live/apex.gleb.ca/privkey.pem
This certificate expires on 2022-12-03.
These files will be updated when the certificate renews.

Deploying certificate
Successfully deployed certificate for apex.gleb.ca to /etc/nginx/conf.d/apex.gleb.ca.conf
Successfully deployed certificate for www.apex.gleb.ca to /etc/nginx/conf.d/apex.gleb.ca.conf
Congratulations! You have successfully enabled HTTPS on https://apex.gleb.ca and https://www.apex.gleb.ca
If you have a look at your Nginx configuration file apex.gleb.ca.conf you will notice new lines added by the certbot.
    listen [::]:443 ssl ipv6only=on; # managed by Certbot
    listen 443 ssl; # managed by Certbot
    ssl_certificate /etc/letsencrypt/live/apex.gleb.ca/fullchain.pem; # managed by Certbot
    ssl_certificate_key /etc/letsencrypt/live/apex.gleb.ca/privkey.pem; # managed by Certbot
    include /etc/letsencrypt/options-ssl-nginx.conf; # managed by Certbot
    ssl_dhparam /etc/letsencrypt/ssl-dhparams.pem; # managed by Certbot
Having SSL setup now we can correct our configuration for Nginx and define a proxy for the Apex application. We need to add a couple of sections there to define our location and the image directory. The final configuration file will look like this:
#Default folder
server {
    server_name    apex.gleb.ca www.apex.gleb.ca;
    root           /usr/share/nginx/html/apex.gleb.ca;
    index          index.html;
    try_files $uri /index.html;


  location /covid {
    proxy_pass https://m5c5hpup7eqqydh-glebatp01.adb.us-ashburn-1.oraclecloudapps.com/ords/r/covid/covid-ontario/covid_ontario;
    proxy_set_header Origin "" ;
    proxy_set_header X-Forwarded-Host $host:$server_port;
    proxy_set_header X-Real-IP $remote_addr;
    proxy_set_header X-Forwarded-For $proxy_add_x_forwarded_for;
    proxy_set_header X-Forwarded-Proto $scheme;
    proxy_connect_timeout       600;
    proxy_send_timeout          600;
    proxy_read_timeout          600;
    send_timeout                600;
  }

  location /i/ {
    proxy_pass https://m5c5hpup7eqqydh-glebatp01.adb.us-ashburn-1.oraclecloudapps.com/i/;
    proxy_set_header X-Forwarded-Host $host;
    proxy_set_header X-Real-IP $remote_addr;
    proxy_set_header X-Forwarded-For $proxy_add_x_forwarded_for;
  }

    listen [::]:443 ssl ipv6only=on; # managed by Certbot
    listen 443 ssl; # managed by Certbot
    ssl_certificate /etc/letsencrypt/live/apex.gleb.ca/fullchain.pem; # managed by Certbot
    ssl_certificate_key /etc/letsencrypt/live/apex.gleb.ca/privkey.pem; # managed by Certbot
    include /etc/letsencrypt/options-ssl-nginx.conf; # managed by Certbot
    ssl_dhparam /etc/letsencrypt/ssl-dhparams.pem; # managed by Certbot


}

server {
    if ($host = www.apex.gleb.ca) {
        return 301 https://$host$request_uri;
    } # managed by Certbot


    if ($host = apex.gleb.ca) {
        return 301 https://$host$request_uri;
    } # managed by Certbot


    listen         80;
    listen         [::]:80;
    server_name    apex.gleb.ca www.apex.gleb.ca;
    return 404; # managed by Certbot


}
The final things are to modify SELinux parameters to allow forward requests and restart the Nginx.
sudo setsebool -P httpd_can_network_relay 1
sudo getsebool -a | grep httpd
sudo systemctl start nginx
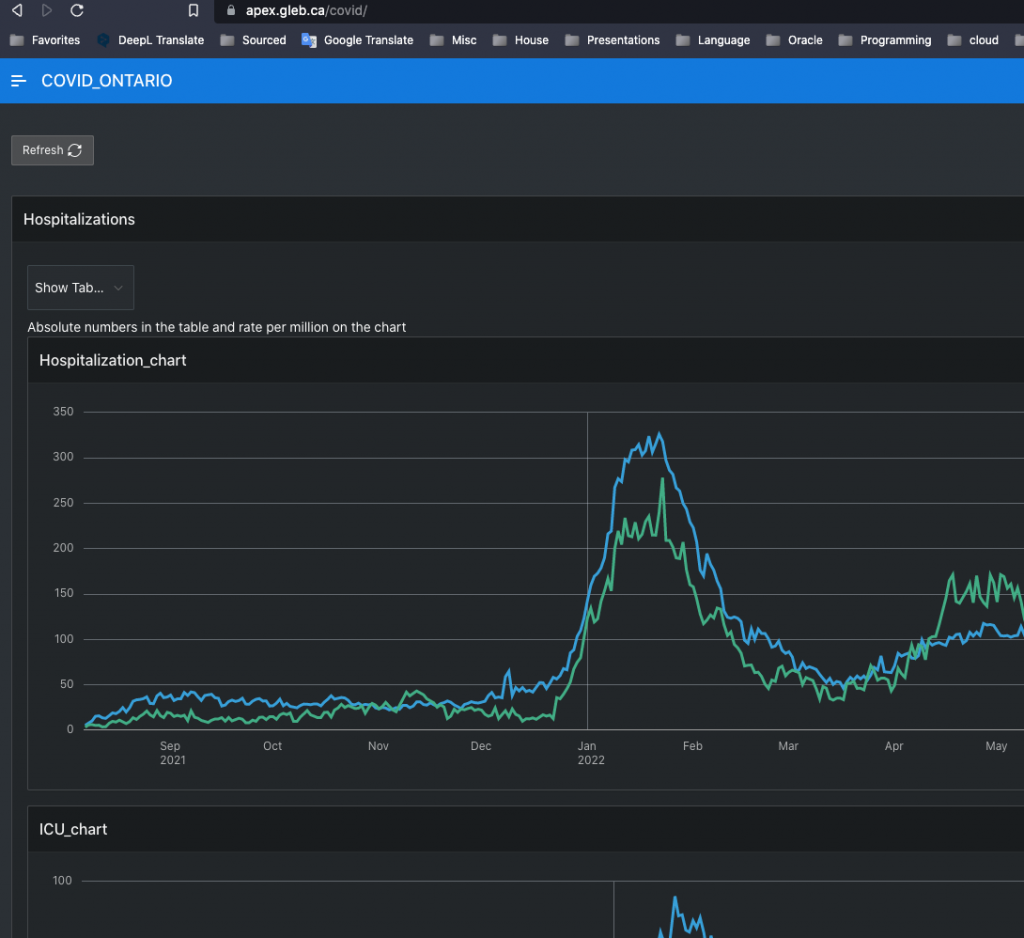
Now our site should be reachable using our custom URL.
I hope this blog can help to make the first steps. Of course you can improve the architecture by placing a load balancer in front of Nginx proxy and making it highly available. Also this configuration might cause some problems with Cross-Origin Resource Sharing (CORS) info and it can be solved by installing and registering the ORDS in our Autonomous database. But this is the subject for another blog.